Contents of this section
Option Screens
Simple Processing Examples
Sample Processing Tables [INPUT & AUTO]
Use of @KEY [triggers]
Use of @SN [screen name]
Output Processing Uses
Flags_Define_Processing_rcabe_dcabe>Second [cabe flags link]
Advanced Concepts
Arrays
Debugger
Drop ALL
Help Screens
ListBox Command
Lookup Dash
Menu Command
O/S File I/O Functions
Sort Select Processing Tables

Option Screens
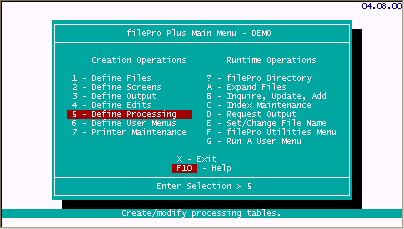
When selecting "Define Processing", you will see a listbox of available files to choose from.
Dont be concerned if the listed files are different than what you see on the above screen since you will have likely created files with different names when using the "Define Files" option. When selecting a file, you will see "Define Processing" options for creating processing as follows;
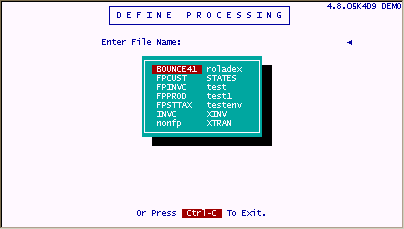
The above options provide for defining 3 different types of processing tables that control data entry and affect the results of output options. Notice that option "4" allows you to change the filename you previously selected so that you do not have to back out of this menu to reselect a file if you make a mistake or when defining processing for more than one file.
Simple Processing Table Examples
This section contains sample INPUT, TRIGGER, and AUTOmatic processing. These are 3 of the most used and useful types of filePro processing. Learning how to read code like this is not difficult. Usually, a good English explanation for each line of code serves well enough to describe how to use a command or function. The Processing Reference contains the syntax and description of every filePro processing function.
INPUT
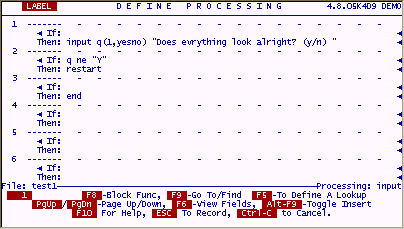
INPUT processing is performed just after the user SAVES the record being added or updated. The following code asks the user if everything on his screen looks okay. Element "1" captures an answer and puts it into a dummy field "q". Element "2" acts on this answer by testing the value of "q". If the answer is anything but "Y", the users cursor is put back onto the screen and he is given a chance to fix whatever didnt look right. The next the user SAVES the record this question is asked again, and again, and again, until he answers with a Y, then the process falls through the test of q and ends. The (1,yesno) after the dummy field q limits the users answer to only one character, and further limits that character to either a Y or an N or an ENTER. (In this process, both N and ENTER mean the whole process will restart.)
TRIGGER (@key)
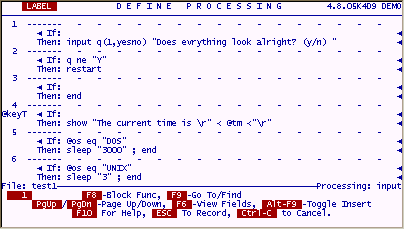
"filePro" can act on many different triggers. These can be events within the program or actions taken by the user. The @keyX trigger is activated whenever the user presses key X. (or whatever key is specified @keyA, @keyB, @key?). @key processing is written on the INPUT table but does not happen when the user SAVES the record. It only happens when the designated key is pressed. This code will put the time on the screen for 3 seconds and then clear it off the screen. (The Unix operating system uses seconds for filePros SLEEP command. Windows uses milliseconds, hence the test to see which operating system is running this code. @os is another system maintained field within filePro.)
AUTO
AUTO processing (called "automatic" under Unix) is performed immediately after a record is retrieved from the disk and just before it is displayed on the screen (or used on an output of some other kind (printouts, etc.). This means fields on a record can be tested and actions taken based on these values before the user ever sees the data.
The following code tests whether this table is being run under IUA. If it is, there will be a current screen. When automatic tables run along with output processes, there is no current screen. FilePro maintains a dummy field that holds the current screen name, @sn.
The first thing this table does is check the value of @sn (the current screen name). If @sn is empty, the process just ends and nothing is done. Therefore this table will only do something under IUA. If this is running under IUA, the next "if" condition will be tested. It says, is the Balance_Due field of this record greater than "500". If it is, sound the speaker. If the test is false, the process falls through to the next line and just ends.
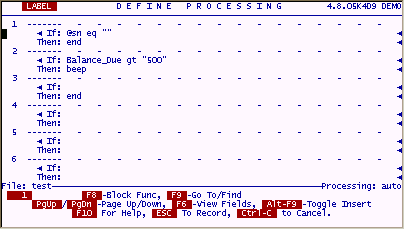
These are very simple examples of processing code. It does not get too much harder than this to understand, you just have to read the syntax on how to use a command and the description of what it does. Then, try it out. Experimentation is the best way to learn any programming language.
Output Processing Tables Uses
"Output" processing tables are usually defined to support output formats i.e. reports, labels and posting actions. The "Define Output Processing" option can also be used to define both "Input" and "Automatic" processing since these types of processing do not have to be called by there respective names when using option flags. Although this may sound confusing, keep in mind that these options are available to you and will be discussed in more detail in the "Define Menus" topic. In essence, the names "INPUT" and "AUTO" or "automatic" can be replaced by names of your choice when using the appropriate flags.
Exporting Data
A common requirement for output processing table is exporting data to ASCII or comma-delimited files for word-processing mail merge. This is easily accomplished with just a few lines of code in most cases.
Example: You want to export name and address information from your customer file to be merged into a "Newsletter".
Select option 5 - "Define Processing" from the filePro Main Menu.
When presented with the following screen, select a filename ( FPCUST in this example).
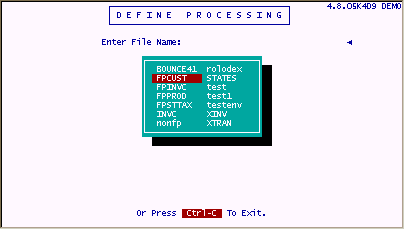
Select 3 - Output Processing
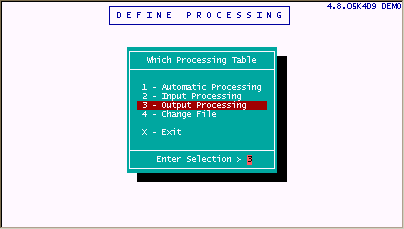
Select [NEW] for a new output processing format name.
Type the name "export" (for this example) and press Return.
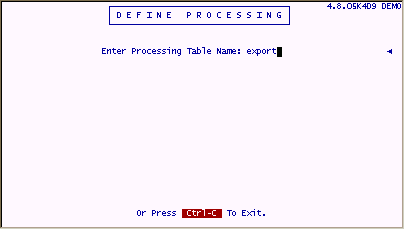
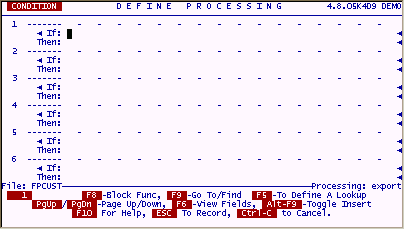
This screen is the same as the screens previously used to create automatic and input processing and contains a Label, Condition and Action sections for each element.
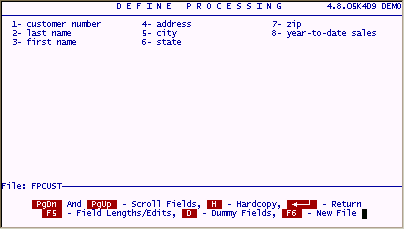
At this point, we need to find the field numbers for the name and address for the mail merge output. Press the F6 key to see the FPCUST fields. For a "word" merge file, the "first name" and "last name" should be combined into a single field so that it reads properly in the newsletter e.g. "John Smith".
We would also want to combine the "City", "State" and "ZIP" into a combined field since they will usually be treated as a single field when being merged into the newsletter.
Enter the following lines to export the FPCUST data.
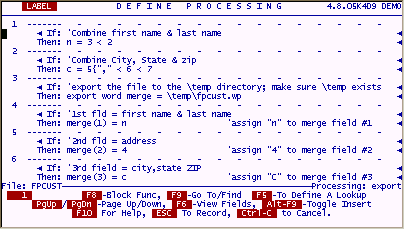
The six lines of code entered in the above table will create a comma-delimited file that can be merged into your newsletter.
Element 1 uses the "<" operator to push the last name left to the "first name" leaving a space between the fields.
Element 2 uses a combination of operators and literal text to combine the "city", "state" and "zip" fields into a single field for the output. The "{" pushes the comma right up against the "city", and the following "<" leaves a single space between the comma and "state", and between "state" and "zip".
Element 3 reflects an "alias assignment" name e.g. "merge" and identifies the output path\filename.
Elements 4 through 6 simply assign the dummy and real field values to positions in the output file "\temp\fpcust.wp" e.g. output position 1 of "merge" is assigned the value of "n" (the combined name); output position 2 is assigned the value of field "4" (address); output position 3 is assigned the value of "c" (combined field for city, state,zip).
When defining processing, make use of comments using the apostrophe to document your code. For the little time that it takes, it will save a lot of time when you want to revise the code. This is imperative when more than one programmer is involved in maintaining a system.
After entering the above lines, press ESC to save the "export" processing table. Answer "Y" to check the syntax and print hardcopies as desired.
Sample Export Output
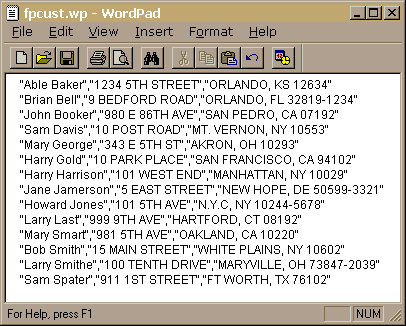
The following is the results of the "export" processing example for file "FPCUST". You can create this sample output by going to Option "D" of the filePro Main Menu, selecting file "FPCUST", selecting format name "export", and selecting all records, or by clicking Run Report . If the format name is not shown, go to "Define Output" and create the Processing-only format sample "export" for file "FPCUST".
Sort & Selection Processing
You will also use the "Define Output Processing" option to develop " Sort and Selection " processing.
NOTE: There are flags for Define Processing (*cabe) which allow you to customize operations from a menu or command line.
Version 6.0