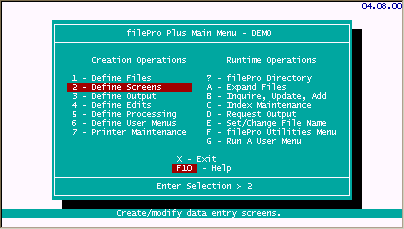
Select 2 - Define Screens.
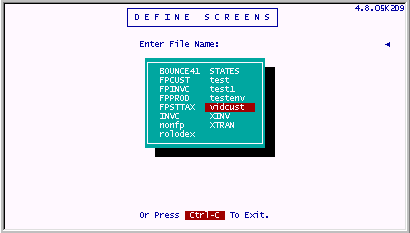
Choose "vidcust".
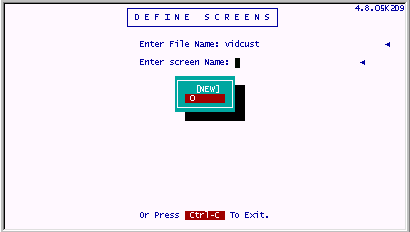
Earlier in this section when we defined our file, a "default" screen 0 was created. We can use this screen as it is, or modify it to suit our tastes. (We could also ignore it, or delete it and build any number of other screens.)
Choose screen 0.
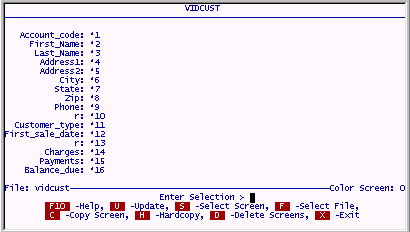
You will see the following screen:
Press U to update this screen and modify it to look like the following screen:
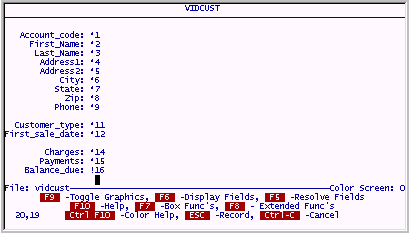
Notice that we have omitted fields 10 and 13. The fields with asterisks ( * ) will be available to the user. In other words, they can put their cursor "into" these fields. The fields with exclamation points ( ! ) are called "protected" fields and they will not allow the user to put his cursor in them. These are fields that will be calculated or displayed by your program. The ( ! ) protects the field from being changed by the user. Another symbol you may want to use is the percent sign ( % ) . This symbol designates that the corresponding field MUST be filled. If the field does not contain data and the user tries to SAVE the record, a warning will be given and the cursor will be returned to this field automatically.
filePro builds our default screen:0 by filling in as many of the fields as it can fit onto the screen. It does this sequentially starting from field 1. It will continue putting fields on the screen in multiple columns until it runs out of space on the screen. It will stop at the first field that causes it to reach the right side of the screen or wrap around it. When it built the "vidcust" default screen, it put the two fields we named "r" on this screen. These fields wont be used at this time. The "r" just stands for "reserved". This is not a filePro term, just a convention. Some programmers label these fields as "spare". Reserved fields are sometimes used just to separate different sections of a file's layout as we did here. They have no place on any screen so we removed them.
When your screen looks like the one shown above, press F5 to see how it will look when it is used in Inquire, Update and Add. This is called "resolving the fields". The markers are called the "end of field markers" and they show graphically where the data for each field will end.
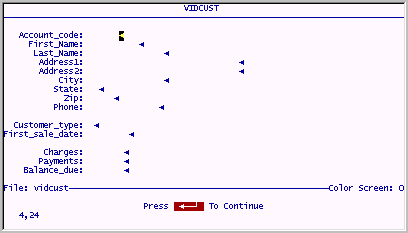
Press ENTER to stop the "resolve fields" display and then press ESC to save your work. Return to the main menu by pressing X.
New in Version 5.8.02 and higher
To implement a scrolling field, place a field as you normally do, but then place a backslash ("\") at the location you want to truncate the visible part of the field. Then, in *clerk, the field will only display as wide as the place you specified with the "\". However, when you are in the field, you can scroll horizontally. The EOF (end of field) designator will now also show a > indicating additional characters for a field when viewing a record. DO NOT attempt to scroll any field less than 3 characters.
New in Version 5.8.03 and higher
In dscreen, pressing the F8 – Extended Functions and the C – Change cusor path you can now press F5 to view the screen, then press ENTER to return to the Cusor path setup.
New in Version 6.0.00 and higher
In dscreen on NEW screens, pressing the F8, and C - Change cursor path, you now have the option to select an automatic cursor path.
Vertical selection
Horizontal selection
Natural Order
Note: Both horizontal and vertical will pick up dummy vars. "Natural order" will not.